


Introduction
On the way to getting Blinky installed on the patio, I found myself on a variety of side quests related to the project. This was the largest one. I needed a box on the patio to house the WLED controller, power supply and other miscellaneous stuff. I’ve had a variety of plans along the way, but I ended up deciding to get a decent sized plastic utility box and mount it on the wall of my patio. After attending a seminar at Tiki Oasis AZ about theming spaces, I felt it would be foolish to install it without theming it. It also pushed me to actually set a theme…something I was resisting because I do want some amount of “just weird stuff” on the patio. So, the high level theme is Toon-Tiki, but I’ll probably refine that over time along with naming the space.
The Design Thoughts
ACME: If you are going to live in a Toon universe, ACME is your go to supplier. There will probably be more ACME provided products in the future.
Machine/Box: I wandered around ideas like a ACME crate. However, I wanted Tiki influence. Not sure where the idea of a drink machine came from, but when it popped in my head I knew that was the answer. It also gave me a themed way of hiding the wires (electrical power. outgoing power and controls).
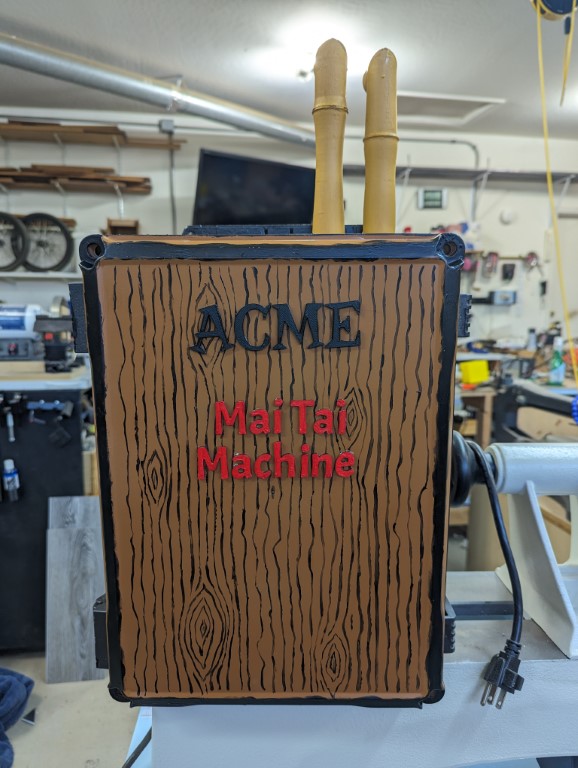
Mai Tai: Who doesn’t like a good Mai Tai. It has four primary ingredients(Rum, Lime, Orange Curaco and Orgeat). I knew I needed to hide two wire paths. So, I added two more fake pipes to match the ingredients. Adding labels to make their purpose obvious seemed like another way to add detail and flourish.
Bamboo Pipes: This is more Gilligan’s Island than toon, but the idea of Bamboo pipes is a common culture trope that I like. I suspect I will use this idea elsewhere.
The Build
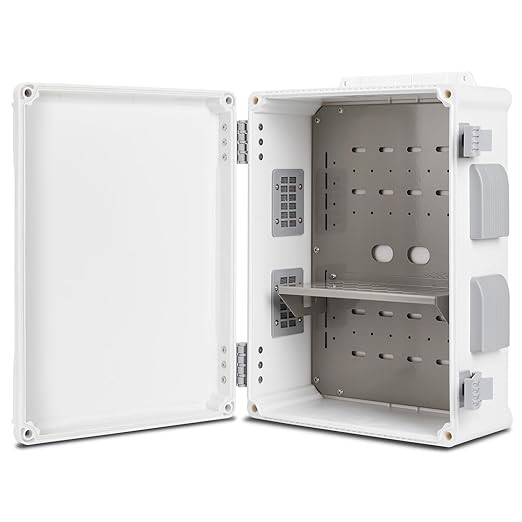
The Box
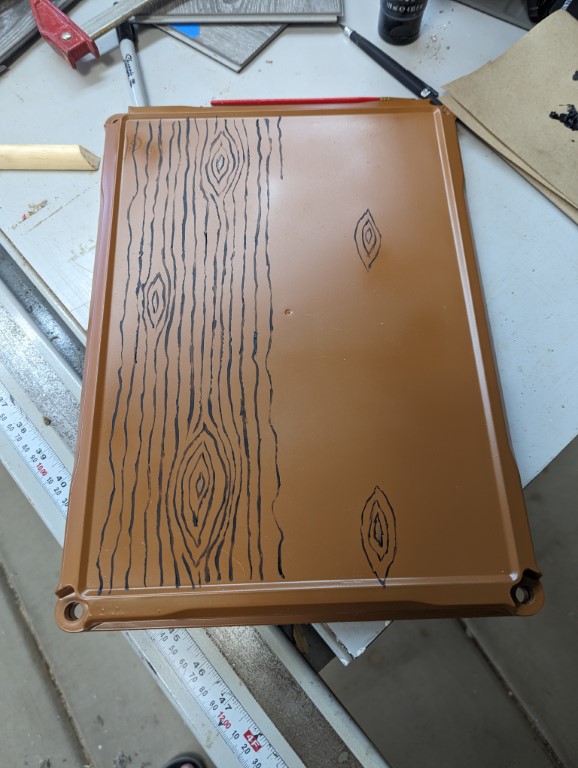
The box is spray painted with a basic brown. The black lines are acrylic paint.
You’ll probably hear this from my regularly, but I’m not an artist. I can’t draw worth a damn. I really don’t understand colors, patterns and designs. I find things I like, but no real understanding of why nor attributes to design and color. So, most of my “art” is finding things, warping the idea and essentially copying them. Whenever I see things that interest me, I save links to projects and have a very large folder of pictures captured over several years. I will also go searching for things I need. In this case, I found a couple of cartoon/line drawing pictures of wood grain to see what worked. I used that as a general guide to the paint job.
Lesson Learned: Paint doesn’t like to adhere to plastic. First pass at painting the box failed by peeling off. I ended up buying an Adhesion Promoter spray, which seems to be helping, but the bond between the paint and plastic is weak. I’m expecting it to break down over time.
The lettering was done in Fusion 360 and printed. I considered painting or stenciling the letters. I didn’t think I had a chance of getting it to look good with either process. Printing them out gave me a lot more control over the details and made painting fairly easy. I did have to hunt around for some fonts that I thought would look good.
Learning: Not all fonts can be used on Fusion 360 for extrusion. I suspect it is how the letters are built (ie not properly closed shapes). And, the weirder the font, the more likely it is to have a problem.
Piping
Rum: This is basic 1 inch PVC. Painted with metallic black paint. It goes up and then wraps up under patio cover where it shifts to white. I’m not happy with the choice, but some comments on that below.
Orange Curaco and Orgeat: These are 3D designed and printed using Fusion 360. I found a bunch of pictures of bamboo and did my best swipe at making a model. The model isn’t very good, but I’ve learned that props don’t need to be perfect. Physical detail is lost at a distance and detail tends to come more from the paint. My painting skills are horrible, but I tried to do some layering and dry brushing to make it more realistic. It looks good enough from the expected distance.
Lime: I was just going to use PVC pipe for this as well but ended up just printing it. Note, this is only about 14 inches long. Just long enough to hide the cord going behind the shed. There is a strain relief cable holder behind there as well to avoid putting too much stress on the part.
The piping was attached to the case with epoxy. I’m sure it will break if hit with any force, but it should also be easy enough to repair.
Note, orgeat is made from almonds, hence the picture.
Labels
While the labels seem complicated, they are actually fairly easy. The shape outline is just a rectangle with rounded corners and a matching inset to get the border. The shapes are from the noun project website. I searched for things I wanted and downloaded them as SVGs. I did a bit of clean up and added them to the Fusion 360 project. Then I just extruded to the desired thickness (5mm for the raised, 3mm for the non raised areas). The Rum label is just text. They were then cleaned up with spot Bondo, sanded, primed and painted with acrylic paints.
To mount the labels, I took two approaches. For the ones on the wall, I just glued them there with epoxy. For the others, I printed a small square with a 1/4 inch tube. I glued the square to the label and drilled a hole in the PVC and used epoxy to mount.
I’m a bit worried the lime one will be lost in the shadows, but I don’t think that is a bad thing. The others are very obvious, so having one that takes a bit more looking to spot isn’t bad.
Other Stuff
I attached several strings of outdoor lights to my patio cover a couple of years ago. There was about 6 feet of extra lighting when I hit the end. Up until now, that just draped over to a garden area. It turned out to be the perfect length to go over the Mai Tai machine and wrap around the front of the shed. The lighting result was better than expected. I wish I could have said it was planned, but a lot of things just evolve on their own.
Commentary
PVC Makes for Horrible Conduit
Using PVC was wiring conduit is a bad choice. Wires don’t like to slide through it. I have way too many 90 degree turns that just aren’t friendly. If I were to do it again, I know I would drop the run under the patio cover and do something else to hide them (or even slide PVC in half and just use it as a cover). I did one smart thing, I never glued the PVC together. So, to feed the wires down, I had to break almost have the joints to feed the wires through and then push them back together. I’m not sure I can easily add anything else to it without repeating the entire process,
My General 3D Printing Process
I use various tools for design, but Fusion 360 is my typical go to. I use the free, for personal use version. I’m sure it will go away one day and the subscription is more than I’m willing to pay, so I regularly try out some of the open source competitors.
I print primarily on a Prusa MK3+. I also have a resin printer (Photon) which I will use for the rare detail work. When I last changed the print head, I shifted to the larger .6mm nozzle from the default .4mm. It speeds up the prints but lowers the detail. However, over time I’ve come to find that I want faster prints and I need to cover in Bondo putty and sand anyways, so the detail wasn’t as important. Also, most things I’m printing don’t need that level of detail.
As for the Bondo process, I buy these packs regularly. I’ll either smooth it on while wearing latex gloves or I think it out and spray it on with a cheap Harbor Freight paint sprayer. The latter process works well, but it is more work and more clean up. So, putting it on with my gloved finger is usually the preferred method.
Sanding is boring and messy. At some point, I should probably build a small downdraft table.
Painting for me is usually from a spray can or acrylic painting with brushes. I also have an airbrush set up, but my skills still leave a lot to be desired. I did learn something on this project that is worth calling out. The acrylic paint sets I bought were doing a poor job of covering. I learned that there is an indicator on the paint that indicates opaqueness. What I was using was only partially opaque. I also learned you can mix with fully opaque other colors (e.g. black, white or something close) to get better coverage. This is also one of the reasons the paint job looks a little rough. The layering wasn’t intentional.
Conclusion
I’m happy with the results. Now I need to get Blinky mounted and working. In parallel, I’m updating the lighting in the patio and yard with Hue canister lights (patio) and Novostella 20W flood lights for the yard. The latter work with Home Assistant system, out of the box.
Unfortunately…it is summer in Arizona. Even with a small evaporative cooler on the patio, it is getting hard to sit out there and enjoy the evenings. Also hard to do any work other than the early mornings.